
In this tutorial, we’ll guide you through the process of sending a reset password link via email in a Node.js + Express + MySQL application using Nodemailer. We’ll also cover how to reset/update the password in the application using the sent reset password link.
If you’ve already created a login and registration application using Node.js + Express + MySQL, or you want to add a forget/reset password system with a reset/forget password email link to your application, this tutorial is for you. We’ll show you how to send a reset password link to the user via email and how the user can use the link to reset/update their password in a Node.js + Express + MySQL application.
Node js + Express + MySQL Forgot/Reset Password Email Example
- Step 1: Install Node Express App JS
- Begin by installing Node Express App JS to develop the application.
- Step 2: Install Required Node js Modules
- Install the necessary Node.js modules required for the application, such as Nodemailer, Express, and MySQL.
- Step 3: Connect Node Express JS App with DB
- Connect the Node Express JS app with the MySQL database.
- Step 4: Import Installed Modules in app.js
- Import the installed modules into the app.js file.
- Step 5: Create Forget and Reset Password Routes
- Create routes for forget and reset password functionality, and set up an email send function with Gmail Nodemailer configuration. Create a reset password link and send it to the user’s email account, and create a reset/update password route.
- Step 6: Create Views
- Create the necessary views for the forget password and reset/update password pages.
- Step 7: Run Development Server
- Finally, run the development server to test the application.
The details of each step is as follows.
Step 1 – Install Node Express App JS
Execute the following command on terminal to install express js app:
express --view=ejs blog
Then open blog setup with any text editor. And use the following command to enter your blog app directories, So open your cmd and run the following command:
cd
blog
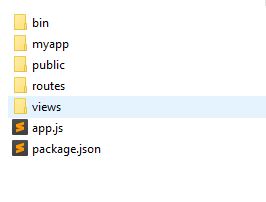
Your node js express js + mysql reset password email app structure looks like this:
Step 2 – Install Required Node js Modules
Install some required node js modules, so open again your cmd and run the following commands:
 npm install express-flash --save
 npm install express-session --save
 npm install method-override --save
 npm install mysql --save
 npm install rand-token --save
 npm install body-parser --save
 npm install bcrypt
 npm install
Here’s a summary of the modules used in this Node.js + Express + MySQL CRUD tutorial:
- Express-flash: An extension of connect-flash that allows you to define and render flash messages without redirecting the request.
- Express-session: Used to create a session, which is a requirement for using Express-flash in this tutorial.
- Method-override: Allows you to use DELETE and PUT methods from an HTML form, as some web browsers only support GET and POST methods.
- MySQL: A driver used to connect Node.js with MySQL.
- Rand-token: A module used to generate random tokens with a chosen level of randomness.
- Body-parser: A middleware responsible for parsing incoming request bodies before handling them.
- Nodemailer: A Node.js module that makes email sending easy.
- Bcrypt: A popular method for salt and hashing passwords. In this tutorial, we use the bcrypt Node.js library to salt and hash passwords before storing them in the database. We also use the bcrypt compare function to authenticate passwords.
If you want to send mail from localhost or without an SSL certificate, you can execute the following command in your terminal:
npm config set strict-ssl false --global

set NODE_TLS_REJECT_UNAUTHORIZED=0
Step 3 – Connect Node Express JS App with DB
Before connecting DB to your node js email verification application, create table into your database by using the following SQL query:
-- phpMyAdmin SQL Dump
-- version 5.0.2
-- https://www.phpmyadmin.net/
--
-- Host: 127.0.0.1
-- Generation Time: Sep 11, 2021 at 02:49 PM
-- Server version: 10.4.14-MariaDB
-- PHP Version: 7.4.9

SET SQL_MODE = "NO_AUTO_VALUE_ON_ZERO";
START TRANSACTION;
SET time_zone = "+00:00";

--
-- Database: `my-node`
--

-- --------------------------------------------------------

--
-- Table structure for table `users`
--

CREATE TABLE `users` (
  `id` int(11) NOT NULL,
  `name` varchar(50) COLLATE utf8mb4_unicode_ci NOT NULL,
  `email` varchar(50) COLLATE utf8mb4_unicode_ci NOT NULL,
  `password` varchar(200) COLLATE utf8mb4_unicode_ci NOT NULL,
  `token` varchar(250) COLLATE utf8mb4_unicode_ci DEFAULT NULL
) ENGINE=InnoDB DEFAULT CHARSET=utf8mb4 COLLATE=utf8mb4_unicode_ci;

--
-- Indexes for dumped tables
--

--
-- Indexes for table `users`
--
ALTER TABLE `users`
  ADD PRIMARY KEY (`id`),
  ADD UNIQUE KEY `email` (`email`);

--
-- AUTO_INCREMENT for dumped tables
--

--
-- AUTO_INCREMENT for table `users`
--
ALTER TABLE `users`
  MODIFY `id` int(11) NOT NULL AUTO_INCREMENT;
COMMIT;
Then visit your app root directory and create one file name database.js. Then add the following code into your database.js file:
 var mysql=require('mysql');
 var connection=mysql.createConnection({
   host:'localhost',
   user:'root',
   password:'',
   database:'my-node'
 });
connection.connect(function(error){
   if(!!error){
     console.log(error);
   }else{
     console.log('Connected!:)');
   }
 });
module.exports = connection;
Note that, This file is used to connect your node express js app to MySQL db.
Step 4 – Import Installed Modules in app.js
Import above installed node js modules in app.js file; So, Open your app.js file and import all the packages above installed in app.js file.
So go to app.js file and update the following code:
var createError = require('http-errors');
var express = require('express');
var path = require('path');
var cookieParser = require('cookie-parser');
var logger = require('morgan');
var flash = require('express-flash');
var session = require('express-session');
var bodyParser = require('body-parser');

var indexRouter = require('./routes/index');
var usersRouter = require('./routes/users');

var app = express();


// view engine setup
app.set('views', path.join(__dirname, 'views'));
app.set('view engine', 'ejs');

app.use(logger('dev'));
app.use(express.json());
app.use(express.urlencoded({ extended: false }));
app.use(cookieParser());
app.use(express.static(path.join(__dirname, 'public')));

app.use(session({
    secret: '123458cat',
    resave: false,
    saveUninitialized: true,
    cookie: { maxAge: 60000 }
}))

app.use(flash());

//app.use('/', indexRouter);
app.use('/', usersRouter);

// catch 404 and forward to error handler
app.use(function(req, res, next) {
  next(createError(404));

});

// error handler
app.use(function(err, req, res, next) {
  // set locals, only providing error in development
  res.locals.message = err.message;
  res.locals.error = req.app.get('env') === 'development' ? err : {};

  // render the error page
  res.status(err.status || 500);
  res.render('error');

});

app.listen(4000, function () {
    console.log('Node app is running on port 4000');
});

module.exports = app;
Step 5 – Create Forget and Reset Password Route
Create forget and reset password routes with send link email; so visit routes directory and open index.js route file and create routes as shown below:
Create Email Send Function with Gmail nodemailer configuration
//send email
function sendEmail(email, token) {

    var email = email;
    var token = token;

    var mail = nodemailer.createTransport({
        service: 'gmail',
        auth: {
            user: '', // Your email id
            pass: '' // Your password
        }
    });

    var mailOptions = {
        from: '[email protected]',
        to: email,
        subject: 'Reset Password Link - Tutsmake.com',
        html: '<p>You requested for reset password, kindly use this <a href="http://localhost:4000/reset-password?token=' + token + '">link</a> to reset your password</p>'

    };

    mail.sendMail(mailOptions, function(error, info) {
        if (error) {
            console.log(1)
        } else {
            console.log(0)
        }
    });
}
Now open the link https://myaccount.google.com/lesssecureapps to Allow less secure apps: ON. It will send the email using Gmail account.
Create Reset Password Link with Send to Email
/* send reset password link in email */
router.post('/reset-password-email', function(req, res, next) {

    var email = req.body.email;

    //console.log(sendEmail(email, fullUrl));

    connection.query('SELECT * FROM users WHERE email ="' + email + '"', function(err, result) {
        if (err) throw err;

        var type = ''
        var msg = ''

        console.log(result[0]);

        if (result[0].email.length > 0) {

           var token = randtoken.generate(20);

           var sent = sendEmail(email, token);

             if (sent != '0') {

                var data = {
                    token: token
                }

                connection.query('UPDATE users SET ? WHERE email ="' + email + '"', data, function(err, result) {
                    if(err) throw err

                })

                type = 'success';
                msg = 'The reset password link has been sent to your email address';

            } else {
                type = 'error';
                msg = 'Something goes to wrong. Please try again';
            }

        } else {
            console.log('2');
            type = 'error';
            msg = 'The Email is not registered with us';

        }

        req.flash(type, msg);
        res.redirect('/');
    });
})
Create Reset/Update Password route
/* update password to database */
router.post('/update-password', function(req, res, next) {

    var token = req.body.token;
    var password = req.body.password;

   connection.query('SELECT * FROM users WHERE token ="' + token + '"', function(err, result) {
        if (err) throw err;

        var type
        var msg

        if (result.length > 0) {

              var saltRounds = 10;

             // var hash = bcrypt.hash(password, saltRounds);

            bcrypt.genSalt(saltRounds, function(err, salt) {
                  bcrypt.hash(password, salt, function(err, hash) {

                   var data = {
                        password: hash
                    }

                    connection.query('UPDATE users SET ? WHERE email ="' + result[0].email + '"', data, function(err, result) {
                        if(err) throw err

                    });

                  });
              });

            type = 'success';
            msg = 'Your password has been updated successfully';

        } else {

            console.log('2');
            type = 'success';
            msg = 'Invalid link; please try again';

            }

        req.flash(type, msg);
        res.redirect('/');
    });
})
Complete source code of users.js route:
var express = require('express');
var router = express.Router();
var connection = require('../database.js');
var nodemailer = require('nodemailer');
var bcrypt = require('bcrypt');
var randtoken = require('rand-token');
//send email
function sendEmail(email, token) {
var email = email;
var token = token;
var mail = nodemailer.createTransport({
service: 'gmail',
auth: {
user: '', // Your email id
pass: '' // Your password
}
});
var mailOptions = {
from: '[email protected]',
to: email,
subject: 'Reset Password Link - Tutsmake.com',
html: '<p>You requested for reset password, kindly use this <a href="http://localhost:4000/reset-password?token=' + token + '">link</a> to reset your password</p>'
};
mail.sendMail(mailOptions, function(error, info) {
if (error) {
console.log(1)
} else {
console.log(0)
}
});
}
/* home page */
router.get('/', function(req, res, next) {
res.render('index', {
title: 'Forget Password Page'
});
});
/* send reset password link in email */
router.post('/reset-password-email', function(req, res, next) {
var email = req.body.email;
//console.log(sendEmail(email, fullUrl));
connection.query('SELECT * FROM users WHERE email ="' + email + '"', function(err, result) {
if (err) throw err;
var type = ''
var msg = ''
console.log(result[0]);
if (result[0].email.length > 0) {
var token = randtoken.generate(20);
var sent = sendEmail(email, token);
if (sent != '0') {
var data = {
token: token
}
connection.query('UPDATE users SET ? WHERE email ="' + email + '"', data, function(err, result) {
if(err) throw err
})
type = 'success';
msg = 'The reset password link has been sent to your email address';
} else {
type = 'error';
msg = 'Something goes to wrong. Please try again';
}
} else {
console.log('2');
type = 'error';
msg = 'The Email is not registered with us';
}
req.flash(type, msg);
res.redirect('/');
});
})
/* reset page */
router.get('/reset-password', function(req, res, next) {
res.render('reset-password', {
title: 'Reset Password Page',
token: req.query.token
});
});
/* update password to database */
router.post('/update-password', function(req, res, next) {
var token = req.body.token;
var password = req.body.password;
connection.query('SELECT * FROM users WHERE token ="' + token + '"', function(err, result) {
if (err) throw err;
var type
var msg
if (result.length > 0) {
var saltRounds = 10;
// var hash = bcrypt.hash(password, saltRounds);
bcrypt.genSalt(saltRounds, function(err, salt) {
bcrypt.hash(password, salt, function(err, hash) {
var data = {
password: hash
}
connection.query('UPDATE users SET ? WHERE email ="' + result[0].email + '"', data, function(err, result) {
if(err) throw err
});
});
});
type = 'success';
msg = 'Your password has been updated successfully';
} else {
console.log('2');
type = 'success';
msg = 'Invalid link; please try again';
}
req.flash(type, msg);
res.redirect('/');
});
})
module.exports = router;
Step 5 – Create views
Create forget password and reset/update password pages; so visit your app root directory and find views directory.
Forget Password Page
Then inside this directory create one file index.ejs. And add the following code into it:
<!DOCTYPE html>
<html>
<head>
<title><%= title %></title>
<link rel="stylesheet" href="https://stackpath.bootstrapcdn.com/bootstrap/4.1.3/css/bootstrap.min.css">
</head>
<body class="container mt-3">
<% if (messages.error) { %>
<p style="color:red"><%- messages.error %></p>
<% } %>
<% if (messages.success) { %>
<p style="color:green"><%- messages.success %></p>
<% } %>
<h1 class="mb-3"><%= title %></h1>
<form action="/reset-password-email" method="post" name="form1">
<div class="form-group">
<label for="exampleInputEmail1">Email</label>
<input type="email" name="email" class="form-control" id="email" aria-describedby="emailHelp" placeholder="Enter email" value="">
</div>
<input type="submit" class="btn btn-primary" value="Send Verification Link">
</form>
</body>
</html>
Reset/Update Password Page
Then inside this directory create one file reset-password.ejs. And add the following code into it:
<!DOCTYPE html>
<html>
<head>
<title><%= title %> - tutsmake.com</title>
<link rel="stylesheet" href="https://stackpath.bootstrapcdn.com/bootstrap/4.1.3/css/bootstrap.min.css">
</head>
<body class="container mt-3">
<% if (messages.error) { %>
<p style="color:red"><%- messages.error %></p>
<% } %>
<% if (messages.success) { %>
<p style="color:green"><%- messages.success %></p>
<% } %>
<h1 class="mb-3"><%= title %></h1>
<form action="/update-password" method="post" name="form1">
<input type="hidden" name="token" class="form-control" value="<%= token %>">
<div class="form-group">
<label for="exampleInputEmail1">Password</label>
<input type="password" name="password" class="form-control" id="password" aria-describedby="emailHelp" placeholder="Please Enter New Password" value="">
</div>
<input type="submit" class="btn btn-primary" value="Update Password">
</form>
</body>
</html>
Step 7 – Run Development Server
You can use the following command to run the development server:
//run the below command
npm start
after run this command open your browser and hit
http://127.0.0.1:4000/
Sorting Out Error
If you encounter an error while sending an email with Gmail SMTP, you can follow these steps to resolve it:
- Enable the Gmail service to be used in third-party apps. If you forget to do this, you may face such an error. To resolve this error, log in to your Gmail account and enable less secure apps using this link: https://myaccount.google.com/lesssecureapps.
- If you see an error related to a self-signed certificate in the certificate chain, you can execute this command on your terminal:
npm config set strict-ssl false --global
Additionally, you can set the following environment variable to bypass SSL verification:
NODE_TLS_REJECT_UNAUTHORIZED=0
These steps should help you resolve any errors related to sending emails with Gmail SMTP.
Conclusion
In this tutorial, you learned how to send a forget/reset password link via email in a Node.js + Express + MySQL application using Nodemailer. We also covered how to reset/update the password in the application using the sent reset password link.
By following the steps outlined in this tutorial, you can add forget/reset password functionality to your application and allow users to reset their passwords easily and securely.