
There is a widget in Python GUI which allows the user to choose only one of a predefined set of exclusive options, that widget is known as Tkinter Radio Button. This widget offers a multiple-choice button. Many radio buttons can be used. By using the Tab key you can switch from one radionbutton to another.
Syntax:
The parameter, master represents the parent window and the options are used to set a various attributes as key-values separated by commas. The options are described below:
Options of Tkinker Radio Button:
bg: Background color behind the indicator and label.
fg: Color used to render the text.
font: Font used for the text.
padx: Amount of padding in terms of pixels
activeforeground: Foreground color when the mouse is over the radio button widget.
activebackground: Background color when the mouse is over the radio button widget.
command: When the state of this widget is changed, command procedure is called.
text: Label displayed next to the radio button. To display multiple lines of text it use newlines (“\n”).
highlightcolor: The text color when the widget is under focus.
pady: Tells the amount of padding in terms of pixels for the area around the widget.
selectcolor: Color of the radio button when it is set. By default it’s red.
Cursor: When the mouse is hovering over this widget, it can be changed to a special cursor type like an arrow or dot.
justify: This method specifies the text alignment within the widget. One of “left”, “center”, or “right”.
borderwidth: Size of the border around the indicator part itself. By default it’s 2 pixels.
image: Set this option to an image object to display a graphic image instead of text for this radio button.
state: By default state=NORMAL, but it can be set as state=DISABLED to gray out the control and make it unresponsive. If the cursor is currently over the radiobutton, the state is ACTIVE.
Methods of Tkinker Radio Button:
select(): This method turns on the radio button.
deselect():This method turns off the radio button.
invoke(): Through this method you can call the same actions that would occur if the user clicked on the radio button to change its state.
flash(): This method flashes the radio button a few times between its active and normal colors, but leaves it the way it started.
Example:
from tkinter import *
appWindow = Tk()
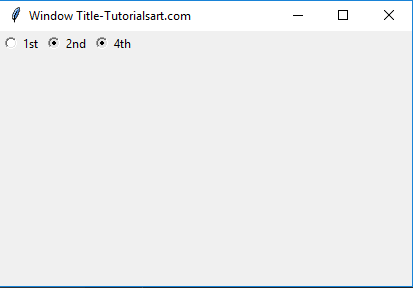
appWindow.title("Window Title-Tutorialsart.com")
appWindow.geometry('350x200')
radioB1 = Radiobutton(appWindow,text='1st', value=1)
radioB2 = Radiobutton(appWindow,text='2nd', value=2)
radioB3 = Radiobutton(appWindow,text='3rd', value=3)
radioB4 = Radiobutton(appWindow,text='4th', value=4)
radioB1.grid(column=0, row=0)
radioB2.grid(column=1, row=0)
radioB3.grid(column=2, row=0)
radioB4.grid(column=2, row=0)
appWindow.mainloop()
Output:
Comments are closed.